
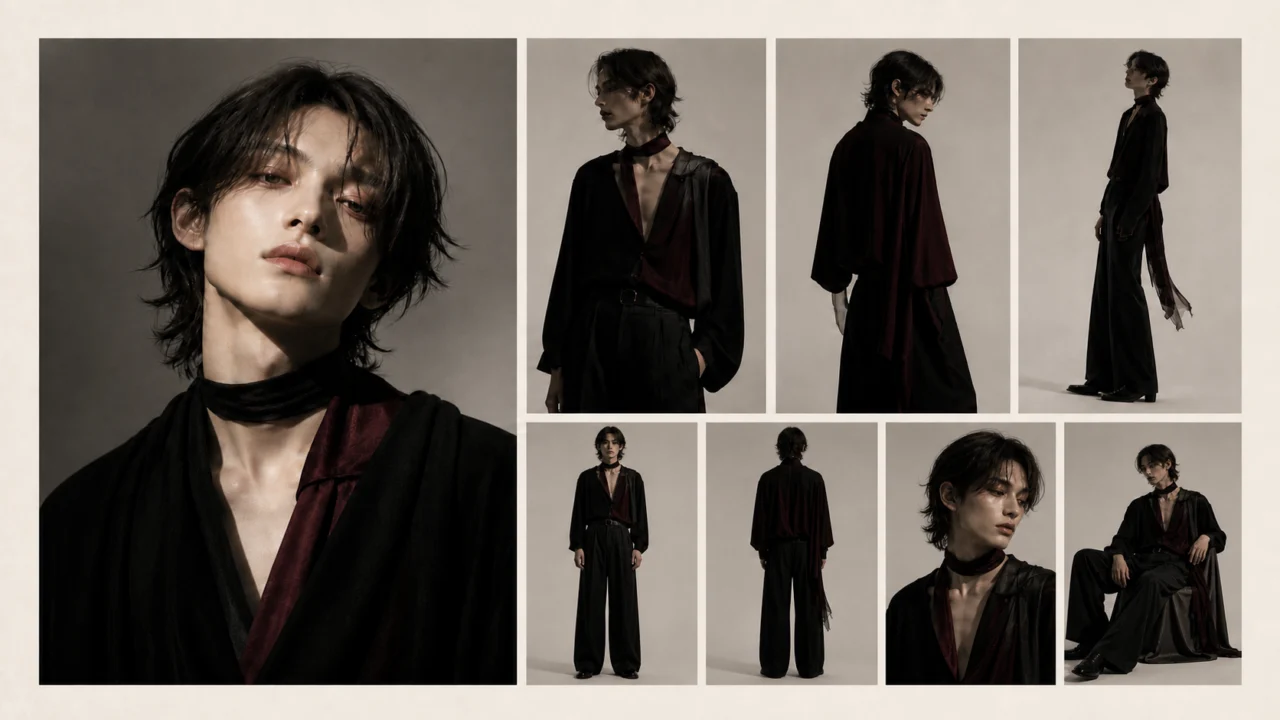
Creating one convincing AI portrait is easy. Creating that same person again—at another angle, in a new outfit, under different lighting, or in a completely different scene—is where the workflow usually breaks.
The solution is not a longer character description. A reliable consistent character AI workflow treats identity as a visual reference system: one approved anchor image, a small set of supporting views, clearly assigned reference roles, and controlled edits that change one variable at a time.
That approach is especially useful for storyboards, virtual creators, campaign characters, comics, game concepts, and any project that needs more than a single attractive image.
Quick Answer
To keep the same character across AI images, start with one high-quality identity anchor, create two or three supporting views, define the features that must not change, and assign each reference a single job. Generate the simplest variation first, change only one major variable per step, and branch every new image from the last approved master. Repair small areas and upscale only after identity is stable.
Why Consistent Characters Became a Hot Topic
An August 14, 2026 Stable Diffusion discussion about using MiniMax H3 as a single-image editor attracted more than 240 upvotes when observed. The experiment covered exactly the tasks creators struggle with: changing outfits, body types, locations, ages, and camera angles; building character sheets and storyboards; stylizing images; and controlling poses with depth references.
The post was interesting because it did not present one polished hero result. It showed a workflow and a range of ordinary outputs without heavily selecting only the best examples.
Related Reddit discussions reached a more useful conclusion than “model X wins.” In a thread asking for the best current image-to-image model, users compared likeness retention, pose understanding, image quality, speed, memory requirements, and multi-reference support. Their recommendations changed with the task.
That is the practical lesson: character consistency is a system problem, not a one-model feature.
Why AI Character Consistency Fails
An image generator does not retrieve a fixed 3D person and photograph them again. It interprets the prompt and references for every new generation. If the instructions are ambiguous, the model may preserve the general idea—a young woman with dark hair, for example—while quietly changing the face, skull shape, age, body proportions, or styling.
Four problems cause most identity drift.
A description is not an identity
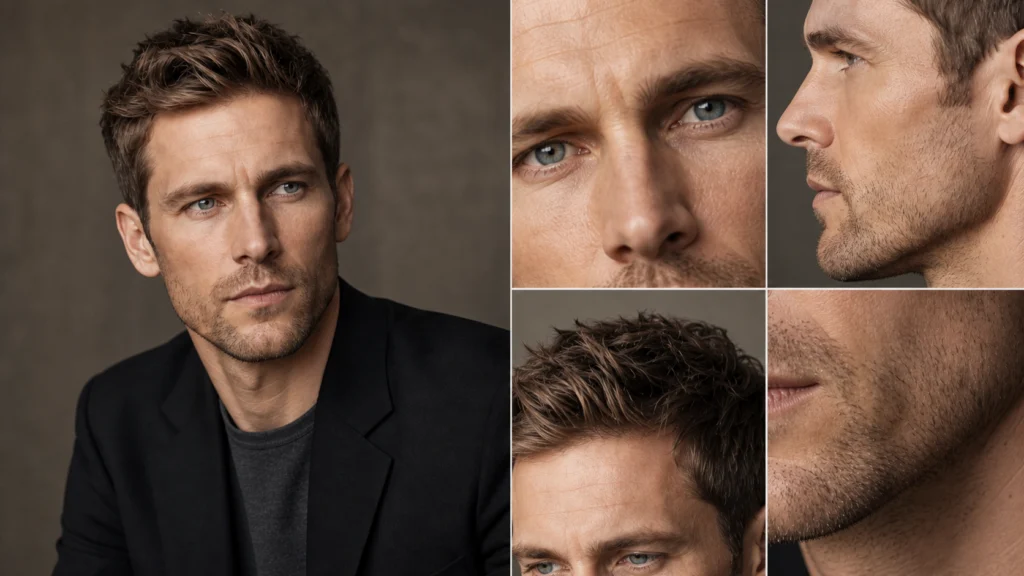
“A man in his thirties with brown hair and blue eyes” describes a category, not a person. Many faces satisfy it. Adding more adjectives can introduce even more opportunities for reinterpretation.
Too many variables change together
If one prompt changes the pose, clothes, lens, location, lighting, expression, and art style, the model has to rebuild almost the entire image. Identity becomes only one constraint among many.
References have conflicting jobs
One image may be intended to preserve the face, another the outfit, and a third the pose. Unless those roles are explicit, the model may copy the wrong face, blend wardrobes, or inherit the pose from the identity image.
Every iteration drifts farther from the source
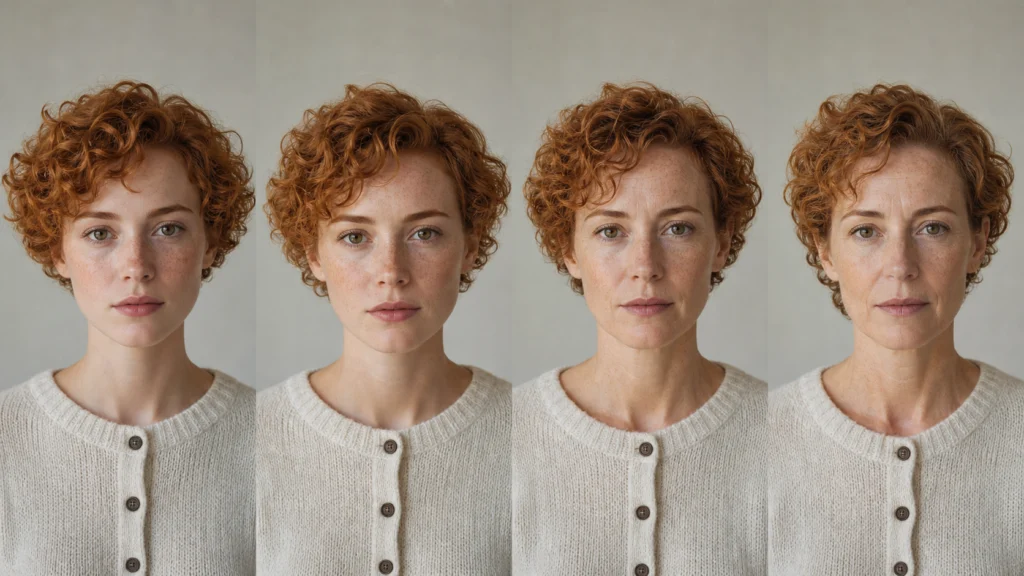
Editing an edit of an edit creates a visual version of the photocopy effect. Small errors in facial proportions, hairline, color, and texture accumulate. The fifth image may still resemble the first, but it no longer feels like the same person.
This preservation-versus-change problem is central to image editing research. The Prompt-to-Prompt paper framed the challenge clearly: edit selected attributes while retaining the composition and content that should remain unchanged.
Define What “The Same Character” Means
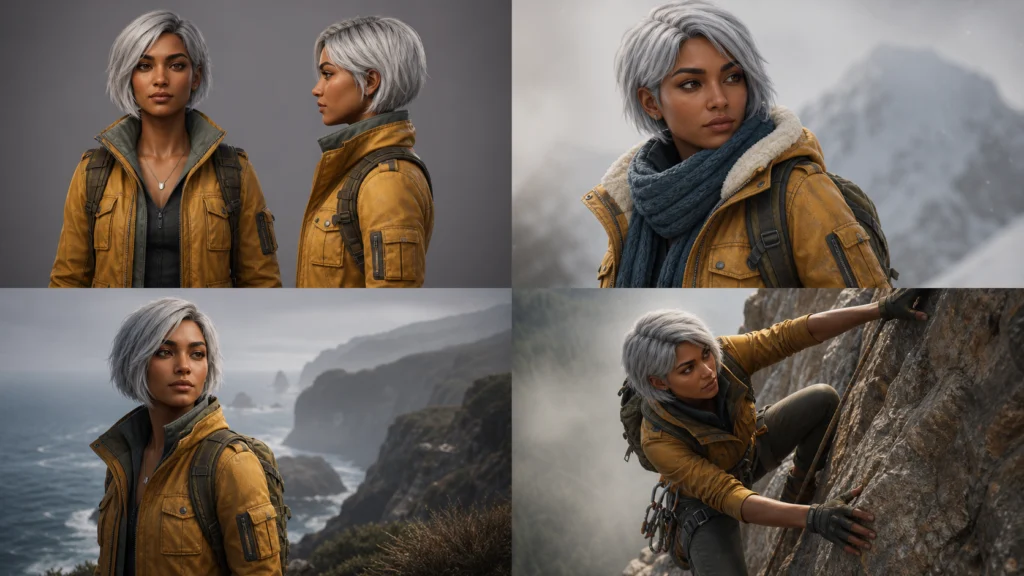
Before generating variations, separate identity from styling. A character can change clothes, location, and mood without becoming a different person.
| Layer | Usually lock | Usually allow to change |
|---|---|---|
| Face | eye spacing, nose shape, jaw, lips, facial proportions | expression, makeup, minor age effects |
| Hair | hairline, base color, texture | styling, movement, accessories |
| Body | height impression, shoulder width, proportions | pose, gesture, camera distance |
| Skin | tone, freckles, moles, scars | lighting response, temporary makeup |
| Wardrobe | signature item or color, if identity-critical | outfit, fabric, season, formality |
| Image language | realism level and core aesthetic | location, shot size, time of day |
Choose three to five unmistakable identity anchors. For example:
- heart-shaped face with a narrow chin;
- deep-set hazel eyes with straight brows;
- small mole beneath the left eye;
- shoulder-length copper curls;
- long neck and narrow shoulders.
Do not turn the list into a biography. It is a visual quality-control checklist.
Build a Small Character Reference Pack
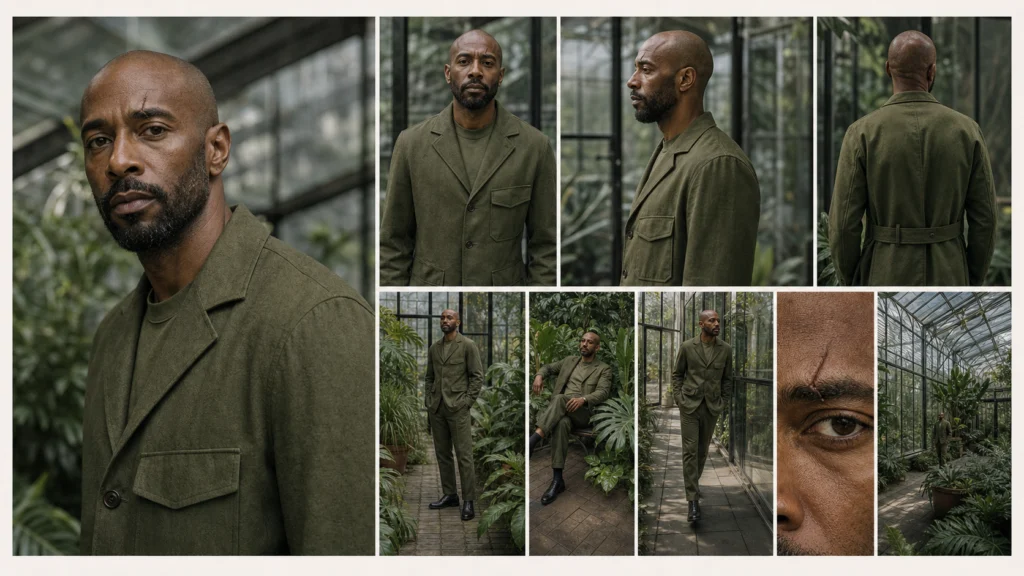
More references are not automatically better. A compact, clean pack is easier for both the model and the creator to understand.
Reference 1: the identity anchor
Use the clearest approved image of the character. The face should be large enough to inspect, with natural lighting, limited occlusion, and no extreme expression. A three-quarter portrait often shows more identity information than a perfectly frontal passport-style image.
Avoid heavy beauty filters, dramatic colored light, hands covering the face, sunglasses, or a very shallow crop that hides the hairline and jaw.
Reference 2: a full-body proportion view
Add a neutral standing image that establishes height impression, shoulder-to-hip balance, limb proportions, and the way clothes fit. This prevents a model from preserving the face while inventing a different body.
Reference 3: a profile or three-quarter support view
Side information helps preserve the nose bridge, chin projection, forehead, ear position, and hairstyle volume. It is especially valuable when the next scene uses a strong camera angle.
Optional references: outfit, pose, or environment
Only add a reference when it has a clear purpose. Label it mentally—or in the prompt—as one of these:
- Identity reference: who the person is.
- Outfit reference: what the person wears.
- Pose reference: body position and gesture only.
- Style reference: color, lighting, texture, or medium.
- Scene reference: location and composition.
If two references disagree about the face, choose one identity source. Do not ask the model to average them.
The Practical Consistent Character AI Workflow
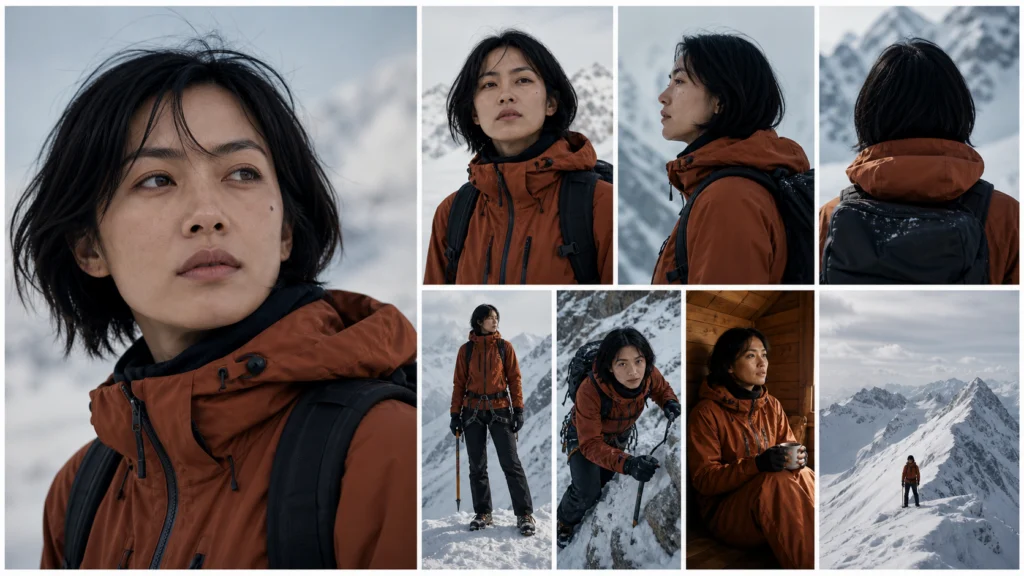
Step 1: Select one approved master image
Do not begin with five “almost right” portraits. Pick the image that best represents the character and declare it the master. All important variations should refer back to it.
If the image is visually strong but difficult to describe, use an image analysis workflow to extract its visible subject, composition, lighting, colors, materials, and mood. Linocut’s guide to turning a reference image into a better AI prompt explains how to convert visual details into reusable prompt language.
Then edit the extracted text. Keep identity markers; remove accidental details such as the original background or expression if they should not follow every generation.
Step 2: Create a neutral character sheet
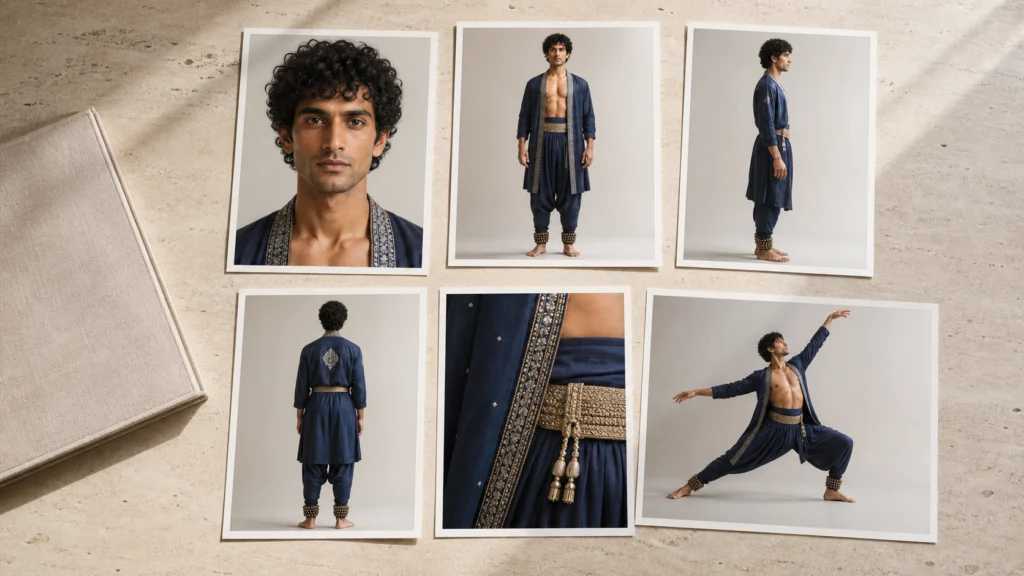
Generate front, three-quarter, profile, and back views against a simple background. Keep the same outfit and neutral lighting during this step. The goal is identity coverage, not cinematic variety.
Use this prompt pattern:
Use Reference 1 as the only identity source. Create a clean character turnaround showing front, three-quarter, side, and back views of the same adult character. Preserve facial structure, hairline, hair color and texture, skin tone, body proportions, and signature features. Keep the same neutral outfit, soft studio lighting, plain gray background, and consistent scale. Do not redesign the face or clothing between views.
Inspect each view independently. Character sheets can look convincing as a collage while hiding a different face in every panel.
Step 3: Write “lock” and “change” instructions
Divide the next request into two short blocks.
Lock: identity, facial anatomy, hairline, body proportions, skin details, and any signature feature.
Change: one main variable, such as outfit, pose, scene, camera angle, or style.
This structure is clearer than repeating the full character description and then mixing it with the new creative direction.
Step 4: Assign every reference a role
When using multiple images, state what to take—and what not to take—from each one.
Reference 1 controls identity only. Reference 2 controls the navy wool outfit only; do not copy its model’s face, hair, body, or pose. Reference 3 controls the seated pose and camera angle only. Preserve the character from Reference 1.
This is one of the highest-impact changes you can make to a multi-reference prompt.
Step 5: Test an easy variation first
Before moving the character into a complex action scene, test identity in a controlled edit: a small expression change, a slightly different angle, or a simple wardrobe swap against the same background.
If identity already drifts here, adding a location, dramatic lighting, and a difficult pose will not fix it. Improve the anchor image, simplify the prompt, or test another reference-capable model.
Linocut’s Text to Image workspace supports a reference image in its generation settings, so the approved source and the new visual brief can stay connected during early tests.
Step 6: Change one major axis at a time
A dependable sequence looks like this:
- Lock the face and generate a neutral full-body view.
- Keep that approved identity and change the outfit.
- Keep the approved character and outfit, then change the location.
- Keep the approved scene and character, then change the pose or camera.
- Apply final lighting, cleanup, and resolution work.
Each approved result becomes a branch, not a replacement for the master. If the location version has a weak face, return to the approved character-plus-outfit image instead of continuing from the flawed scene.
Step 7: Score identity before aesthetics
Use the same quick review every time:
- Does the eye spacing match?
- Is the nose and jaw silhouette stable?
- Did the apparent age change?
- Is the hairline still recognizable?
- Are body proportions consistent?
- Did a mole, scar, freckle pattern, or signature accessory move?
- Does the image feel like the same person before you notice the styling?
Reject identity failures even when the lighting or composition is beautiful. A cinematic wrong person is still the wrong result.
Step 8: Repair locally, then upscale
Once the full composition works, correct isolated problems instead of regenerating everything. Mask a hand, accessory, garment edge, or background artifact while protecting the face. Linocut’s Object Remover can clean distractions and rebuild nearby scene texture before the final polish.
Perform resolution enhancement last. The AI Image Upscaler can prepare the approved frame for larger web, social, presentation, or campaign outputs. Always compare the face before and after; enhancement should not invent new identity details.
Four Prompts for the Most Popular Character Tasks
Character turnaround
Use the attached portrait as the sole identity anchor. Create front, three-quarter, side, and back full-body views of the same character. Preserve exact facial proportions, hairline, hair texture, skin tone, age, height impression, and body proportions. Use the same simple outfit and neutral studio light in every view. Plain background, consistent camera height, no accessories added, no facial redesign.
Outfit change
Preserve the person in Reference 1 exactly: same face, age, hairline, hair texture, skin tone, body proportions, and expression. Replace only the clothing with the outfit shown in Reference 2. Take garment cut, fabric, color, and details from Reference 2, but do not copy its person, face, hair, body, pose, or background. Keep the original camera angle and lighting.
Scene change
Place the same character from Reference 1 in a quiet modern hotel lobby at dusk. Preserve identity, body proportions, hairstyle, outfit, and realism level. Change only the environment and its naturally reflected light. Medium full shot, eye-level camera, believable contact shadows, no extra people, no facial redesign.
Pose control
Keep the character from Reference 1 and use Reference 2 only for pose and camera framing. Match the shoulder angle, arm position, weight distribution, and head direction from Reference 2. Do not copy Reference 2’s face, clothing, body type, or background. Preserve the identity, outfit, proportions, and visual style from Reference 1.
What the Reddit Experiments Actually Teach
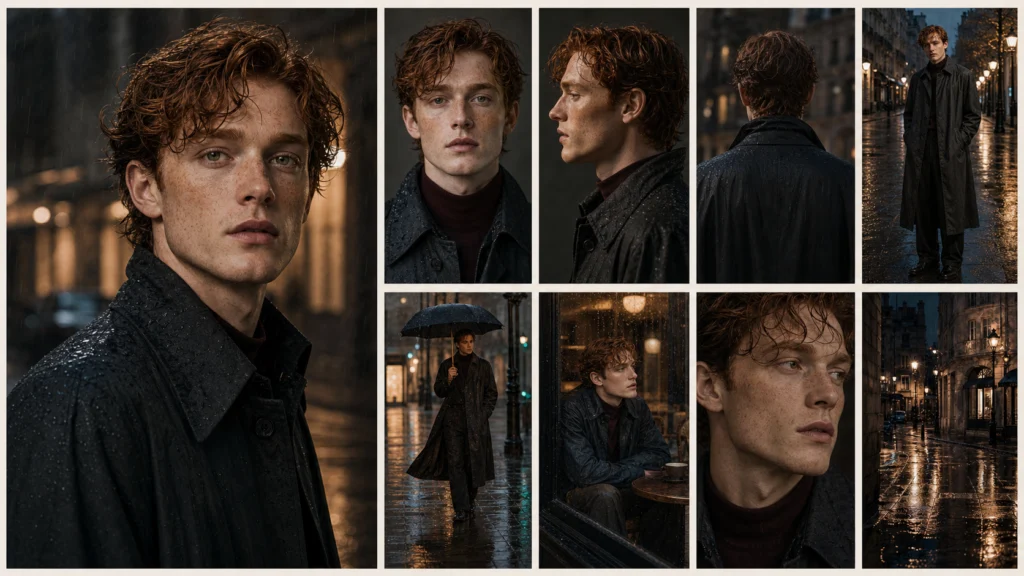
The H3 experiment is valuable as evidence of a broader shift: tools built around references and image editing can perform tasks that used to require custom training or many failed prompt attempts.
But the comments also expose the tradeoffs. Users reported strong likeness retention, spatial understanding, and pose handling, while noting that still-image detail could trail dedicated image models and that stronger prompting or post-processing might be necessary. In the broader comparison thread, some preferred Qwen-based editing, Flux variants, or other models depending on realism, animation, hardware, speed, and project length.
Do not copy someone else’s model ranking without copying their test conditions. Run the same reference pack through each candidate and score it on the tasks your project actually needs.
| Test | What to measure | Why it matters |
|---|---|---|
| Angle test | front, profile, high and low camera | reveals whether identity survives geometry changes |
| Outfit test | new garment with original face and body | exposes reference-role confusion |
| Scene test | indoor, outdoor, day, night | reveals lighting-driven face drift |
| Pose test | seated, walking, reaching | tests body consistency and instruction following |
| Series test | five sequential approved frames | exposes accumulated drift |
The “best” model is the one that loses the fewest identity anchors across your full test—not the one that makes the prettiest first image.
Common Failure Modes and Fixes
The face is similar but not the same
Use a larger, clearer identity crop and reduce competing references. Explicitly lock facial anatomy rather than relying on broad labels such as “same woman.” Keep dramatic lighting out of the first test.
The new outfit changes the body or face
Tell the model to use the clothing reference for garment information only. Preserve the original person’s proportions and pose. If necessary, create the outfit edit against the original background before moving to a new scene.
The pose reference replaces the character
Describe the transferable geometry—head direction, shoulder angle, arm placement, weight distribution—and explicitly reject the pose model’s face, body type, hair, wardrobe, and environment.
The character changes under cinematic lighting
Generate the scene with moderate light first. After identity is approved, introduce colored light, rim light, haze, or high contrast as a separate pass.
The style overwhelms identity
Very strong stylization simplifies or exaggerates facial features. Lock the silhouette and signature anchors, test the style at lower intensity, and accept that a graphic style may preserve design identity better than biometric likeness.
Later images drift more than early ones
Stop chaining edits. Return to the master or the closest approved branch. Keep a simple version tree with filenames such as character-master, outfit-approved, lobby-approved, and pose-03-approved.
A 10-Minute Reference Workflow Checklist
Before generation:
- choose one identity anchor;
- list three to five identity features;
- add one proportion view and one angle view;
- remove weak or conflicting references;
- decide the single main variable to change.
In the prompt:
- name each reference role;
- separate “preserve” from “change”;
- reject accidental transfer from outfit, pose, and scene references;
- keep the first test visually simple.
After generation:
- score the face and body before aesthetics;
- save only approved branches;
- repair local errors instead of rebuilding the frame;
- upscale after identity and composition are final.
Where Linocut Fits in the Workflow
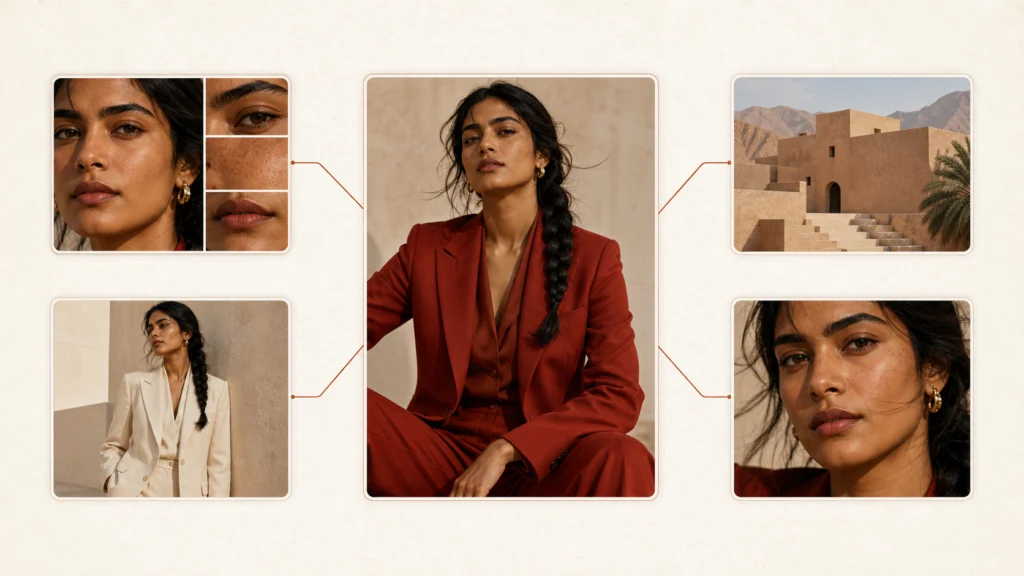
Linocut is useful here because generation is only one part of consistent character production. The same project often needs reference analysis, prompt drafting, generation, cleanup, enhancement, and export.
| Workflow stage | Linocut path | Practical use |
|---|---|---|
| Decode the master image | Image to Prompt workflow | extract reusable subject, camera, light, color, and style language |
| Create the next branch | Text to Image | attach a reference and generate a controlled variation |
| Remove local distractions | Object Remover | repair props or background areas without restarting the image |
| Prepare delivery files | AI Image Upscaler | scale approved images for campaign, social, or presentation use |
The important benefit is continuity: the reference, prompt, result, and next edit do not have to become disconnected assets. That makes it easier to return to an approved branch when an experiment drifts.
FAQ
What is consistent character AI?
Consistent character AI is a generation or editing workflow that preserves a recognizable character’s identity across multiple images while allowing controlled changes to pose, clothing, expression, location, camera, or style.
Can I keep the same AI character with one reference image?
Yes, especially for small changes and nearby camera angles. One clear three-quarter portrait can be a strong identity anchor. For profiles, full-body shots, and difficult poses, a small reference pack usually gives the model more reliable information.
How many character references should I use?
Start with two or three strong references: one identity portrait, one full-body proportion view, and one supporting angle. Add an outfit, pose, or style reference only when it has a specific job. Model limits differ, but clarity matters more than the maximum number of uploads.
Does using the same seed guarantee the same character?
No. A seed can help reproduce aspects of a generation under similar settings, but it does not guarantee stable identity after major prompt, pose, composition, model, or aspect-ratio changes. Visual references and controlled edits are more dependable.
Is a character sheet better than a single portrait?
A character sheet provides more angle and proportion information, so it is usually better for a series. However, it must be internally consistent. Four attractive but different faces in one sheet will create more confusion, not less.
Can I change clothing without changing the face?
Yes. Use the original character as the identity reference and a second image as the clothing-only reference. Tell the model exactly what to borrow from each image, keep the background and pose simple, and make the wardrobe swap before adding another major change.
Do I need to train a LoRA for character consistency?
Not always. A reference-first workflow is faster for short campaigns, concepts, and storyboards. Custom training can be worthwhile for a long-running character, many extreme angles, or a large production library, but it adds setup, testing, and model-specific maintenance.
What is the best AI model for consistent characters?
There is no universal winner. Some models are stronger at likeness, some at pose and spatial reasoning, and others at image quality or multi-reference control. Test the same anchor pack across outfit, scene, angle, and pose tasks, then choose based on the weakest point in your real workflow.
Final Takeaway
Keeping the same character across AI images is less about finding a magic prompt and more about controlling visual information.
Start with one approved identity anchor. Build a compact reference pack. Give each image one job. Separate what must remain from what may change. Change one major variable at a time, branch from approved masters, and leave local repair and upscaling until the end.
Once that structure is in place, character turnarounds, outfit variations, new environments, and controlled poses become repeatable production tasks instead of isolated lucky generations.