case.01
Listing photos
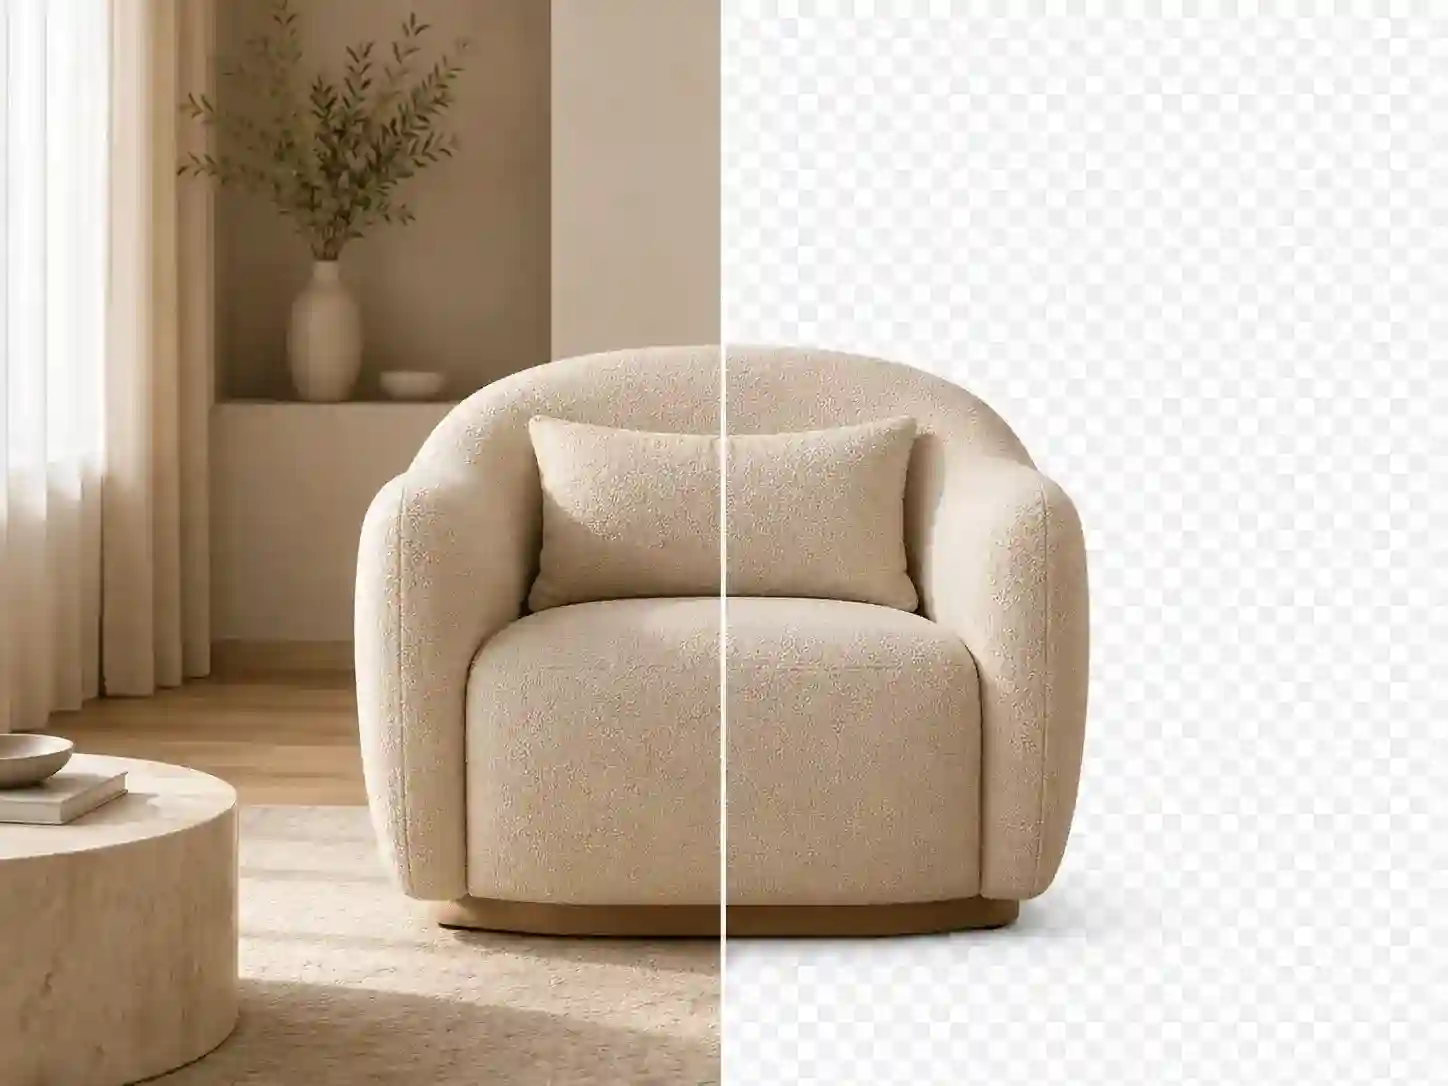
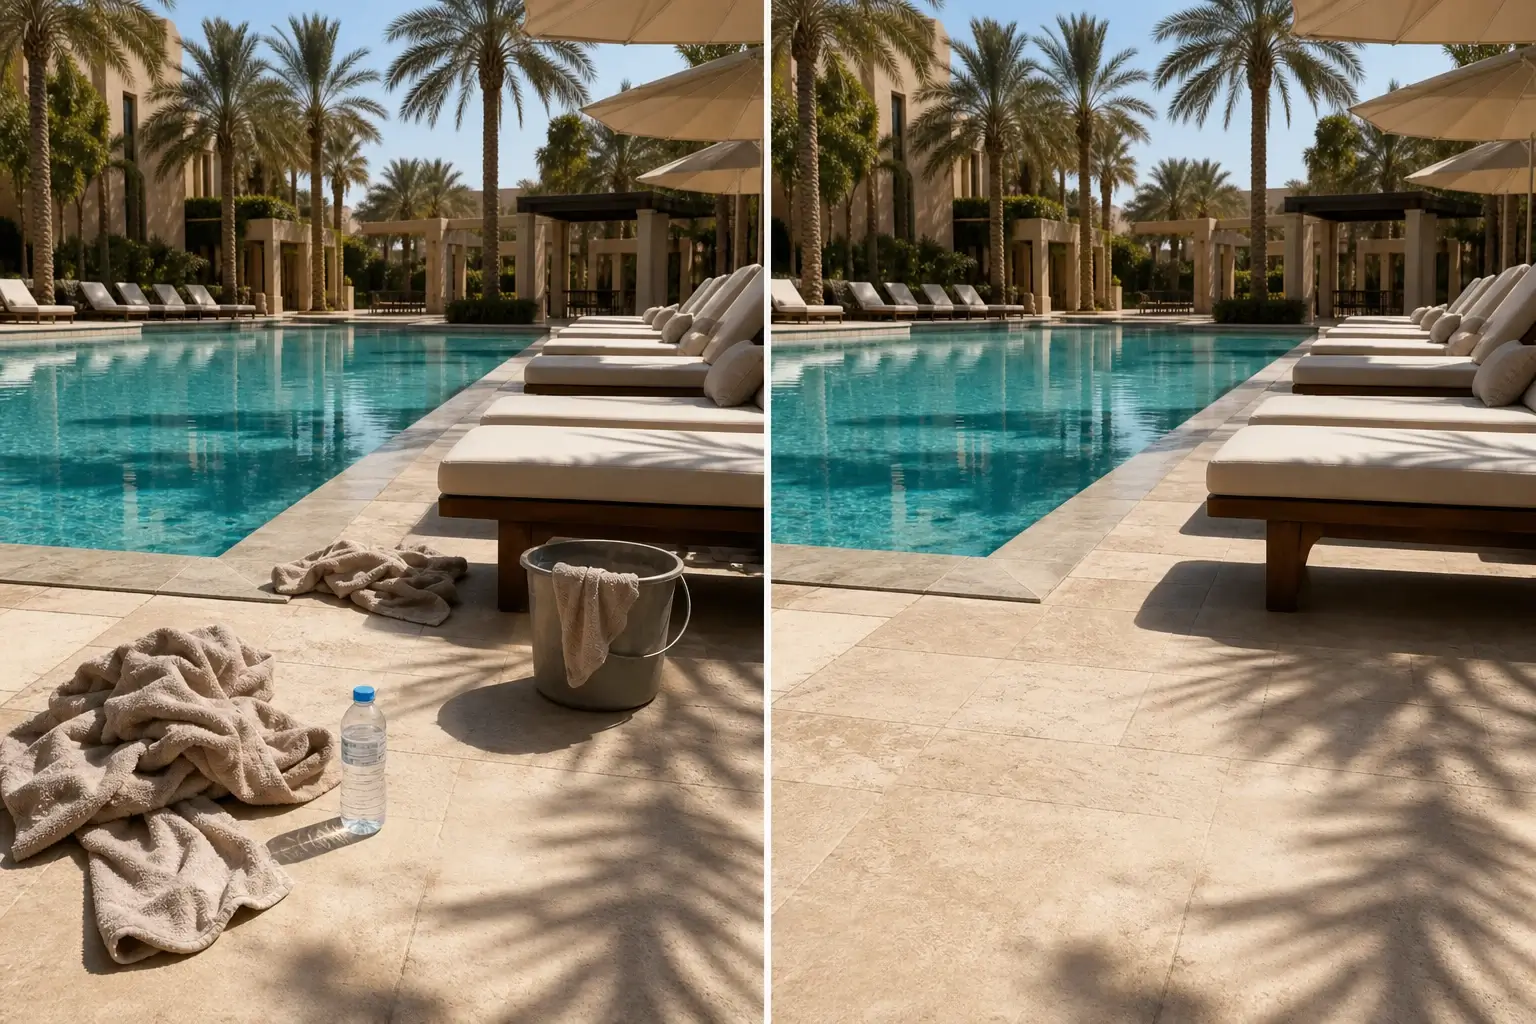
Use the AI object remover to erase props, cables, tags, and clutter from product scenes before enhancement and marketplace export.
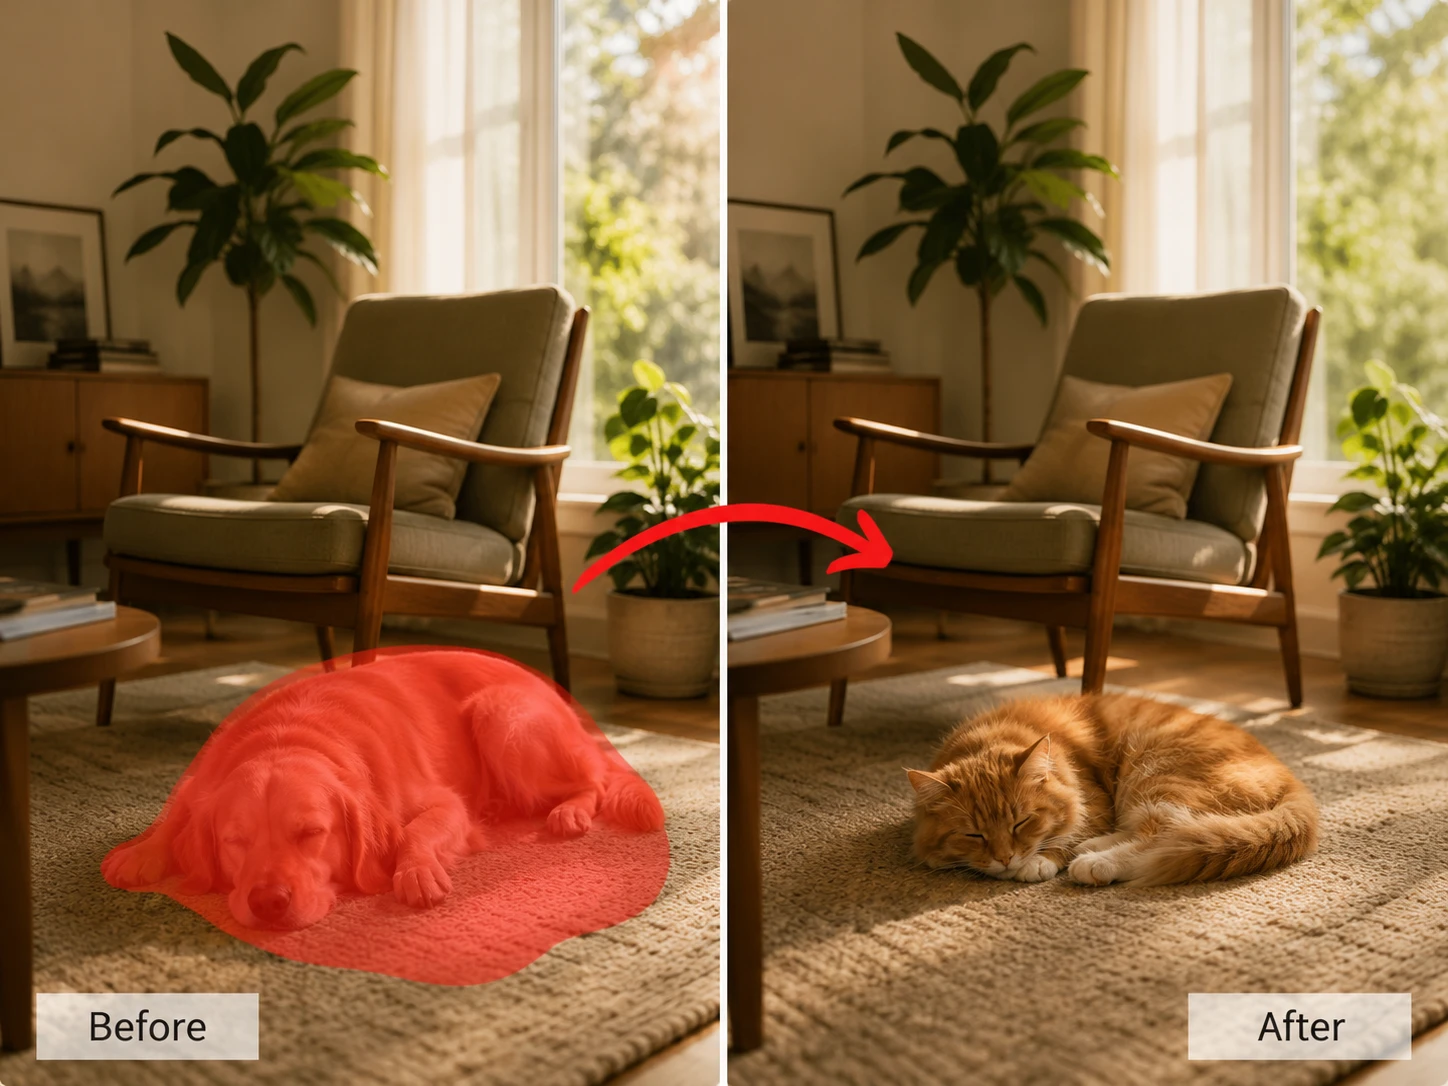
Upload a photo, mask the object to remove, then review the repaired scene in a focused cleanup workspace.


Linocut AI turns a single remove object task into part of a complete creative workspace. Start with one direct action, inspect the result, then keep the output connected to image, video, audio, text, and workflow nodes.
The AI object remover helps remove distractions such as a person, prop, reflection, or small clutter that pulls attention away from the useful image.
Treat object remover output as an image inpainting node that reconstructs texture, shadows, and edges for natural photo cleanup.
Move the object remover result into upscaling, relighting, crop variants, background work, or copy generation after you remove object from photo areas.

 01
01Add the photo with a distraction, prop, person, or unwanted object to the AI object remover.
 02
02Use brush, rectangle, lasso, or eraser controls to mark the object remover mask and remove distractions only where needed.
 03
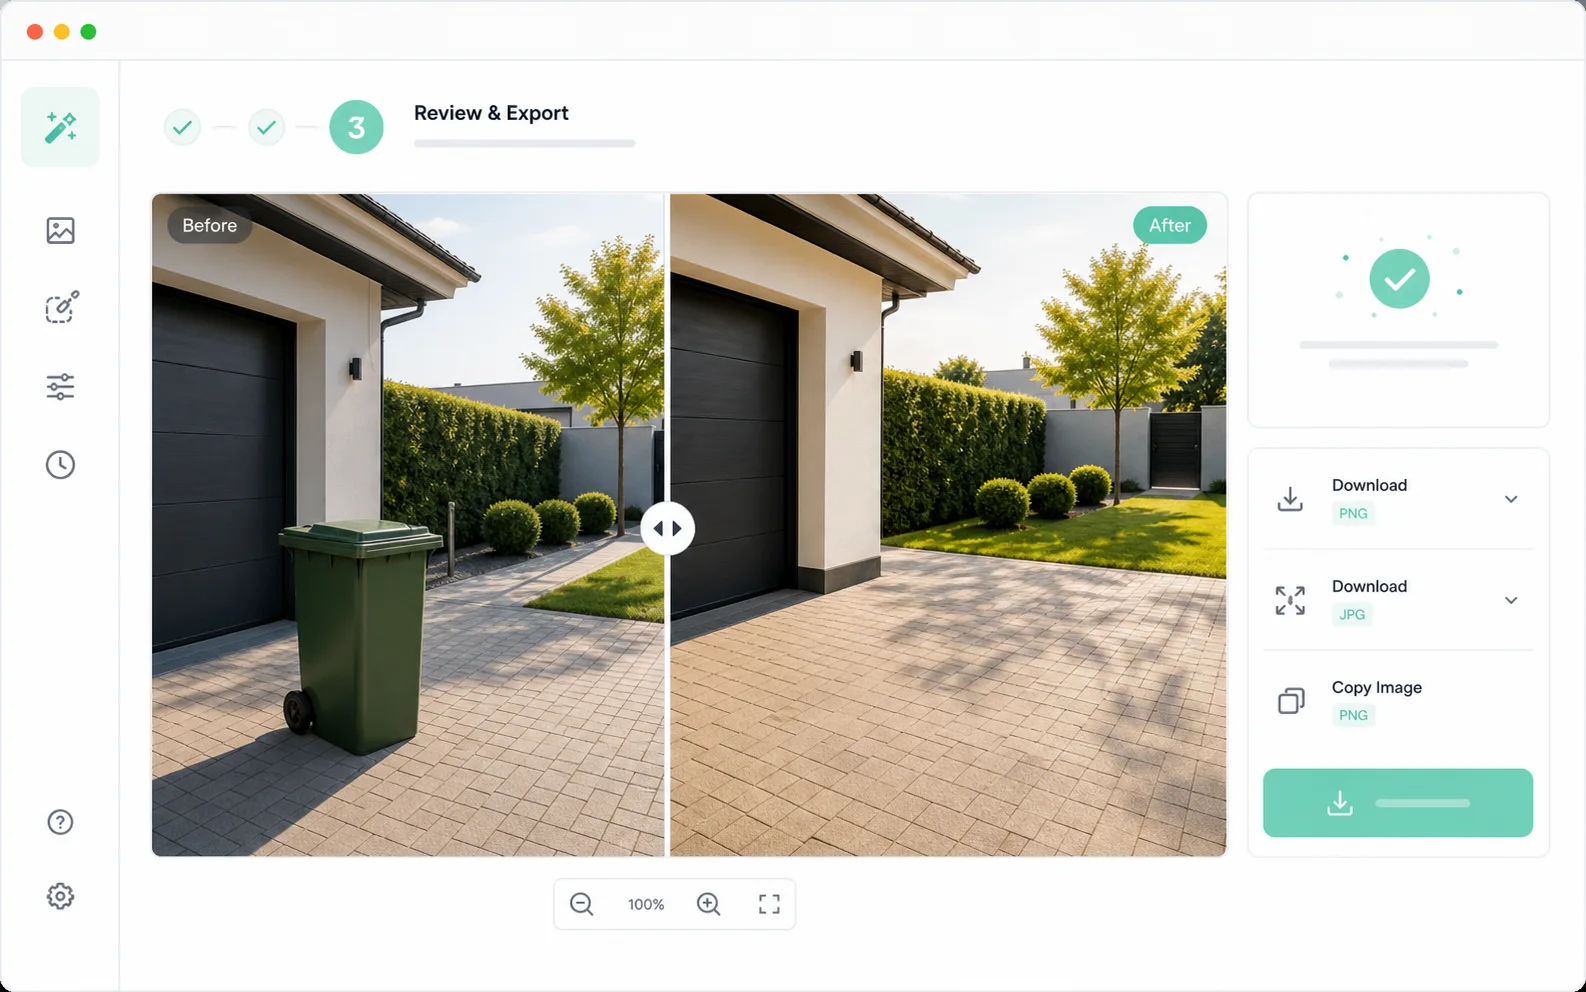
03Inspect the photo cleanup result, then continue into image inpainting, enhancement, or export.

Use an AI object remover to remove distractions while keeping the original photo believable.
Remove object
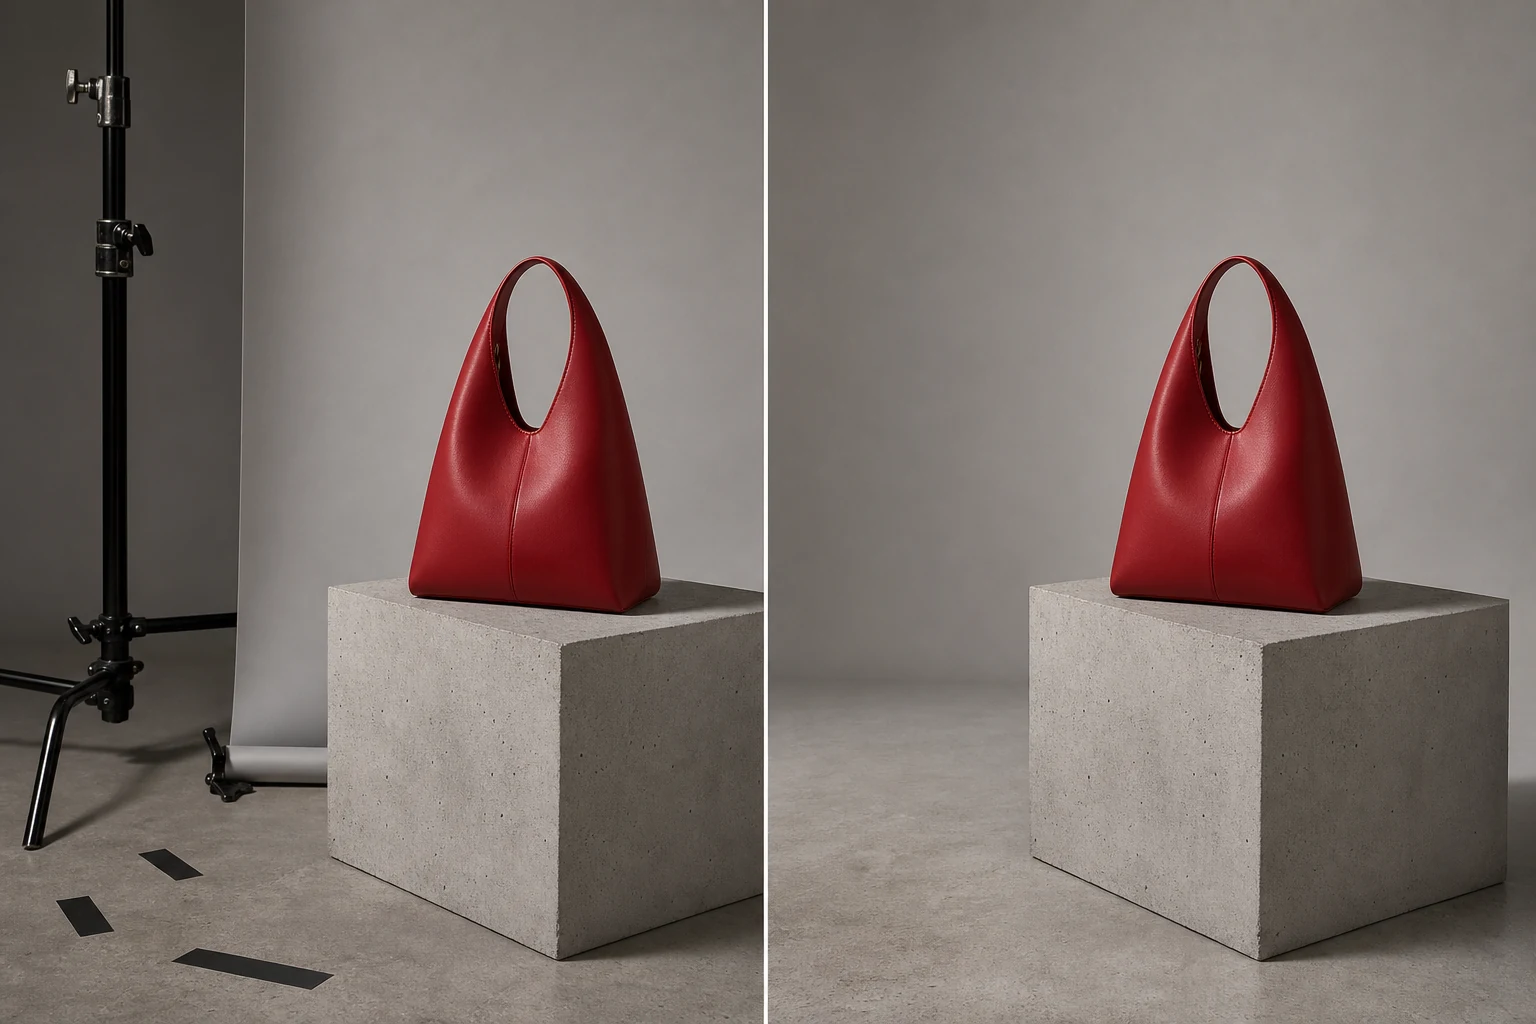
Use the object remover to select the prop, passerby, cable, trash bin, or visual clutter that should disappear.

Tighten the object remover mask around edges so image inpainting keeps nearby faces, labels, furniture, and background lines sharp.

Let image inpainting rebuild hidden wall, sand, fabric, street, or tabletop texture from nearby image context.

Repair leftover cast shadows, reflections, and contact marks so object remover output matches the original light.
Use an AI object remover to remove distractions while keeping the original photo believable.
Use the AI object remover to erase props, cables, tags, and clutter from product scenes before enhancement and marketplace export.
Run object removal on lifestyle frames to remove distractions before campaign images move into layouts.

Use image inpainting to clean visual noise from finished photography while preserving depth, edges, and natural lighting.
Remove object from photo assets such as small table items, street clutter, or foreground distractions before creating social variants.
Removing a distraction is useful only when the repaired scene still feels believable. Linocut AI keeps photo cleanup, masking, repair review, and follow-up edits close together.
Target props, passersby, reflections, cables, or visual clutter when you need to remove distractions while keeping the useful part of the frame intact.
Evaluate whether rebuilt texture, shadow, and edge detail match the surrounding image before using the result.
Move the cleaned scene into enhancement, crop sets, background edits, or campaign assets without restarting the workflow.
Yes. This AI object remover is built as a focused image cleanup flow: upload a source, mark the distracting object, preview the repaired scene, and keep it connected to the larger image workflow.
The object remover is positioned for practical photo cleanup on images you own or are allowed to edit, including props, people in the background, signage, dust, clutter, reflections, and product-scene distractions.
The object remover workflow is mask-first. Only the selected area should be rebuilt with image inpainting, while surrounding composition, edges, lighting, and texture stay stable.
Yes. Object remover output is treated as an image workflow node, so the photo cleanup result can continue into image enhancement, upscaling, background cleanup, copy generation, or export variants.
Use Brush for organic shapes, Rectangle for simple blocks, Lasso for larger irregular areas, and Eraser to refine the object remover mask before processing.
Yes. Product teams can use the object remover for product photo cleanup, including tags, props, cables, dust, reflections, and table clutter before listing or ad export.
Yes, when you have permission to edit the image. Mask the person carefully to remove object from photo areas while the tool rebuilds the background around the selection.
Yes. The object remover is designed to clean the selected object and repair nearby shadows, contact marks, and texture where possible.
The object remover accepts common image inputs in the workspace and exports a clean WebP result for continued editing or download.
Yes. The workspace shows the original source beside the object remover result so you can inspect edges, texture, and repaired areas.
Yes. Send the cleaned image into image enhancer, image upscaler, background remover, inpainting, crop variants, or campaign export.
No. Upload an image, paint an object remover mask, run the cleanup, and review the repaired image before continuing.
Start with one direct task, then keep editing, generating, writing, and shipping from the same Linocut AI canvas.